Fire features make wonderful additions to backyards and patios as they provide luxurious warmth and cozy accent lighting. And if you're familiar with being hands-on, then you know the rewarding feeling of completing a project. Whether venturing into something small or undertaking a large-scale job, we'll walk you through the rundown of key elements required for building your own dream DIY natural gas fire pit!
Planning for Your Installation

First and foremost, it is vitally important to always check your local building code requirements to confirm if a fire pit is permitted in your area. This is step one and should be followed exactly to code before starting any plans for installation. Due to the serious dangers involving combustible materials and fire, failure to understand and comply with such codes can result in damage to property, loss of life, and liability.
We always recommend hiring a certified professional gas installer for your DIY project as this will give you and your loved ones peace of mind knowing your fire pit is correctly built and installed in a location that is a safe distance away from surrounding combustibles.
Once you’ve confirmed what your local building code requirements are and have hired a certified professional, we’ll move on to the rest! In your quest to finding the right parts and components for your outdoor oasis, we understand how it may be a little daunting to know where to start.
An easy way to narrow down your choice is to ask yourself what your goals are. Where do you picture installing your fire pit? How many people you are trying to accommodate? What kind of heat distribution you are looking for? Once you have a general idea of what you want, it is important to understand that certain factors can determine the rest of how your DIY gas fire pit is built out. Read on to find out!
Simplifying On-Site Construction Time with Enclosures

To help reduce dedicated time invested into your project, we recommend unfinished fire pit enclosures. Although completely optional, unfinished fire pit enclosures are prefabricated shells that provide a basic framework for your DIY gas fire pit so that there isn't any guesswork involved. They're oftentimes made from hardie board and can range from round, square, rectangle, and even specialty shapes such as octagonal. 36" - 45" sizes are large enough to seat 6-8 people and 45" - 60" sizes are large enough to seat 8-12 people comfortably.
While Gas fire pits can be made from different types of materials such as copper, steel, aluminum, and concrete, DIY fire pits in particular use bricks, stucco, stone, and veneer cladding—most of which can be found at your local home improvement store. Whether you prefer the traditional brick look or want to opt for a more modern style, unfinished enclosures make a great choice and can help save you money by cutting down on construction time.
If you find that unfinished fire pit enclosures just aren't for you and you want to stick to the good ole’ basic bricks or concrete pavers, just know that your fire pit will still require ventilation (we discuss this more in detail later on in the article.)
Determining the Gas Burner and Pan Size

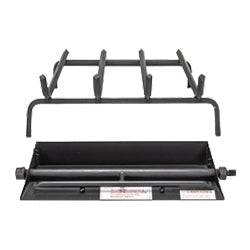
Achieve the best heat distribution and enjoy a blazing fire by investing in high-quality components. Burners and pans made with a 304 stainless steel construction ensure they will not rust and corrode when exposed to the natural outdoor elements. Our in-house Starfire Designs burners feature a 1/2" raised hub designed to prevent moisture from collecting on the pan and seeping into the gas line. Our Round Burner Pans and Square Burner Pans are purposefully designed with weep holes to help drain out water. We offer gas burners in an assortment of sizes and shapes to suit your living space needs.
Pro tip: Cut down on time and money with Fire Pit Burner System Kits. Rather than buying your components separately, these kits conveniently include the pan, burner, and ignition system to help simplify the task.
Keep in mind that the fuel line determines the burner size. Burners under 30" in size have a 1/2" gas inlet—it's what we call standard capacity in the industry. Burners over 30" in size have a 3/4" gas inlet and is what we call high capacity. If you haven't already determined the general desired heat output for your outdoor living space, then be sure to read our Guide to BTUs article. It offers a comprehensive breakdown of what a British Thermal Unit is, how it affects flame height, and how it is related to gas pressure.
If you don't have access to a gas hardline in your area but still want the satisfaction of building something you can be proud of, a DIY Propane Gas Fire Pit may prove to be a better option for you.
Reducing Costs with Form Fitting Ledges
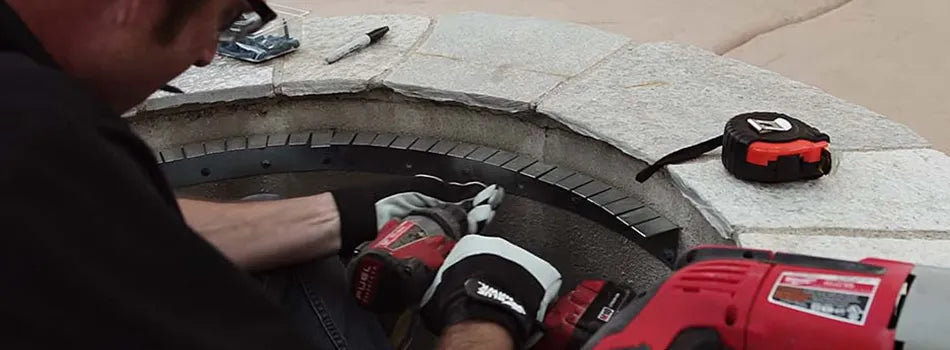
When it comes to shortcutting projects, form fitting ledges are the only exception we recommend. Form fitting ledges are brackets installed inside an enclosure's opening to support the burner and pan. The empty space inside the enclosure, beneath the burner and pan, that these ledges create work in conjunction with vents to help improve much needed air flow for ventilation and combustion. Ledges also offer the added benefit of minimizing the need to purchase pounds upon pounds of lava rock filler, making it a popular money-saving solution.
If you have a round fire pit, we highly recommend Form Fitting Fire Pit Ledges. Our form fitting ledge can be shaped to fit concave, convex, and linear interior walls. While it makes a great option for contouring against almost any styled structure, we recommend Slotted Angle Irons from Home Depot or other local hardware stores for other fire pit shapes. If you plan on building a fire pit over 30", we recommend supporting your pan and burner with crossbars for more stable support.
Creating A Relaxing, Cozy Ambiance with Gas Flex Lines
Connecting your fuel source to your gas burner system with a whistle-free flex line can make a world of a difference to the ambiance created in your outdoor oasis. Eliminate unwanted whistling noise caused by the friction between gas pressure and low quality design, such as rubber hoses, and opt for flex lines made of stainless steel and those with a corrugated ribbing.
Optimizing Air Flow and Performance with Vents
Air flow plays a crucial role in the successful operation of your gas fire pit. Equal amounts of oxygen, heat, and fuel are needed to sustain proper combustion. That means when there is more (or less) of one element present, the combustion process can cease—preventing your fire pit from producing the luxurious flames you crave, or can build up excessive pressure—causing the potential danger of an explosion.
As such, we recommend installing a minimum of two fire pit vents at ground level for optimal cross ventilation, temperature control, and water drainage. Cool air entering through the inside of the enclosure mixes with the other elements of heat and fuel for combustion and is then released back out the vent for temperature regulation. Vents are needed to help minimalize overheating—especially if you plan on installing an electronic ignition system or using propane gas as your fuel source, be sure to check out our previous DIY Propane Fire Pit article for more in depth information.
Since electronic components are susceptible to overheating, they need an outlet to release excessive heat. And fire pits running on propane gas are no exception. Because propane gas is heavier than air, it will pool and collect to the floor—oftentimes lending it to go undetected when there is a gas leak. Gas fire pits require ample ventilation at the base of the fire pit to prevent fuel from pooling or pressure from building, each of which has the potential to cause an explosion.
Vents work simultaneously with the burner system to drain water, which can also cause unwanted damage like rust and corrosion. Remember when we mentioned earlier how our form fitting ledges help support the burner system and leave an empty interior space within the enclosure? The vents located at the bottom of the enclosure help remove water and prevents it from accumulating inside.
Lighting the Perfect Fire with Ignition Systems
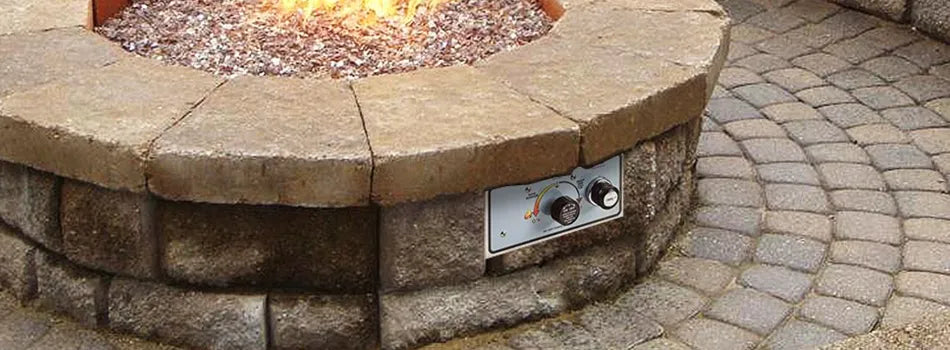
Bring your fire pit to life with your choice of ignition system. Match lit ignition systems are the standard method of lighting that requires turning the key valve in one hand while lighting the burner system with a long lighting with the other, at the same time. Because there are fewer moving parts involved in match lit systems, they make a great option if you’re on a budget and want to worry less about upkeep. To eliminate the hassle of fiddling around with match sticks and long lighters, you may want to consider other startup options.
Push button spark ignitions are just a step up from match lit ignition systems, but instead of using a long lighter to ignite a flame, you create a spark by pushing a button. If safety and comfort are a top priority for you, you may want to consider an electronic ignition system. Electronic ignition systems can be wired to a wall switch, remote, or home system for the convenience of easy lighting. They have a built-in feature that will monitor the flame and automatically shut off the gas flow to your burner system should the absence of flame be detected, overall adding an extra level of safety and peace of mind. Just keep in mind that ignitions involving electronic components tend to be more expensive and will require more maintenance, like replacing the batteries and replacing electronic parts over time.
Decorating with Fire Glass and Other Fire Media Alternatives
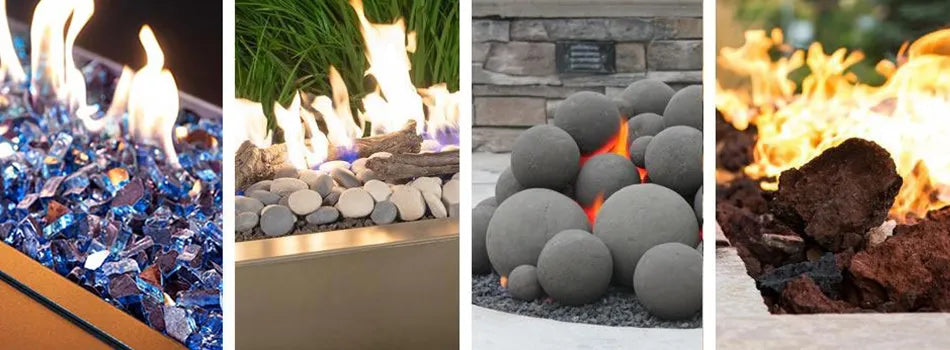
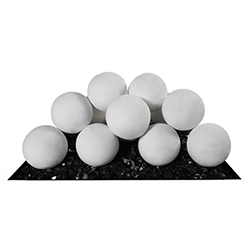
Achieve your desired look by decorating your burner system with fire glass or other fire media alternatives. From vibrant, jewel-like fire glass to traditional lava rock and contemporary fire shapes, there's a style for everyone. The great thing about fire media is that you can swap them out seasonally to match your surrounding decor. You don't always have to stick to one style. All materials invested into your DIY fire pit project, from the enclosure and components and even to the fire media itself, must be specifically made for use in fires. Regular rocks, river stones, and the like that you see in nature should not be used in your fire pit as they can pop and crack.
Hiring a Certified Professional Gas Plumber for Safety

Before you embark on your DIY project journey, it's imperative that you contact a certified and professional installer to ensure safety and proper performance (here's a more in-depth breakdown on why you should hire a professional installer). Because natural gas and propane are combustible materials, gas leaks—resulting from an incorrect installation or loose fittings not fastened properly—can cause explosions and carbon monoxide poisoning.
Even when parts and components are installed correctly, layering your burner with too much fire media can also result in an unwanted explosion due to poor venting and restricted air flow. It's crucial that you follow the instructions provided in your owners manual, even for fire media. By hiring a professional installer, not only do you save time and money, but you also gain comfort and satisfaction knowing you and your loves ones can enjoy your DIY fire pit safely. No one wants to pay hidden costs or live with the consequences of loved ones being injured caused by a dangerous and incorrect installation. Do you?
With the above checklist, we hope we've provided some insightful tools for planning your DIY gas fire pit project. While having high-quality components is equally as important as having the correct parts; even more so, hiring a certified professional to overlook your installation is top tier for your safety and the safety of loved ones. Not sure which parts or components will work best for your space? Our knowledgeable team members are here to help you along your DIY journey. For any additional questions on this subject—or for expert help on any project—feel free to contact our friendly and knowledgeable staff by filling out this simple form.


