


There’s something about building a fire pit yourself that really speaks to homeowners. Maybe for you it’s that you’re looking to save some money, or perhaps you have something very specific in mind and want to bring it to life, or maybe you’re the sort of person who enjoys the feeling of accomplishment that comes with the completion of a project. Whichever drives you, we’re honored to be able to guide you through the process with some tips and tricks of the trade.
Know Your Fire Pit Size
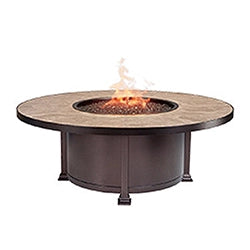
 This DIY fire pit is the perfect height for chatting around with friends and family on a cool evening.
Having this bit of information will make a world of difference when it comes to planning out your project. We’ve written up a comprehensive guide answering the question How Big Should My Fire Pit Be?, so we’ll provide just a brief summary of it below. Check out the full article for all the nitty gritty details.
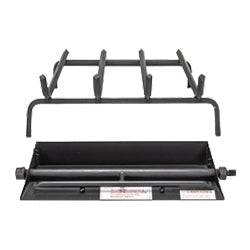
Determine Your Desired BTU Output & Burner Size
If you’re using a liquid propane tank (LPT), you’re going to be a little more limited on the size of your fire pit, since tanks only provide up to 90k BTUs of consistent heat. Our 12” Starfire Designs Fire Ring provides up to that 90k BTUs, but you can use a larger burner to spread out the flames more--just know that the heat will be the same.
If you’re using a built-in line, however, you may be able to achieve more BTUs. The shorter the distance and the larger the fuel line, the more BTUs you can enjoy. For more information on those built-in installations and BTUs to expect, check out our Guide to BTUs article. So, let’s say you’ve decided that 150k BTUs of heat is perfect for your needs. For this BTU output, you’re looking at a 24” Starfire Designs Fire Ring. As with the LPT fuel, you can opt for a larger burner, but that won’t increase your heat output or flame size.
Pick & Measure Your Materials
Step one is picking the right material for you. We cover some of the most popular fire pit materials in our Guide to Fire Pit Materials, but DIY fire pits may not use those. Instead, you may be more inclined to use bricks, cinderblocks, or pavers—which are all good options. Once you have selected your material, you’ll need to measure it.
As a rule, we encourage our customers to leave at least 3” of space on each end of their burner, a safe distance away from the edge of the exterior of the fire pit. So, if you’ve decided on a 24” fire ring, you want to add 3” of space on each side. Meaning that the interior space of your fire pit needs to be 30” wide. Why does this matter, you may ponder? We’re glad you asked!
This space allows you to select the size of your pan, which holds up your burner and fire glass (or rocks) and fulfills the essential job of leaving space at the bottom of the fire pit for air flow--a necessity for propane. Along with this, you can now measure your exterior material to determine just how big your fire pit will be. If your pan is 30” (the same as the interior width of your fire pit based on your 24” ring plus 3” on each side), and your bricks are 4” wide, you’re looking at a fire pit with an overall width of 34”.
Okay, so we’ve figured out needed BTUs, burner size, pan size, materials we want to use, and the overall fire pit size. What comes next? Ignition, my fiery friends.
Select Your Ignition
 The three types of ignitions systems: Match Lit (left), Push Button Spark (middle), and Electronic (AWEIS - right).
You’ll be happy to know that the hard part is all finished. Choosing which ignition you want to use will be the easiest step in your DIY LP fire pit journey.
Match Lit
The classic ignition. To use this system, you’ll manually turn on and off your fuel, and when your fuel is turned on this system requires you to use a match or lighter to ignite the gas. This is always comprised of a key valve, which is connected to your fuel line and acts as the control for manually turning on and off your gas.
Push Button Spark
The next step up. This ignition system is similar to the match lit system in that it requires you to manually turn on and off your gas with a key valve. However, rather than using a match or lighter to start your flames, this system requires you only press a button. No need to keep matches close by.
Electronic
The premium system, there are a few variations of these available. The Fire By Design’s AWEIS boosts your BTUs (depending on PSI/max BTUs available for your installation), is resistant to rain and wind, and can be paired with various control systems. With this upgrade, your DIY fire pit can become the crème de la crème.
Additionally, industry leading HPC offers CSA certified systems for any homeowner who wants that top tier safety peace of mind. Their systems are available in On/Off to turn on and off the flames with the flip of a switch or click of a button, as well as Hi/Lo, which allows for flame height control, also with the flip of a switch or the click of a button.
Add Your Fixing’s
 This diagram shows the parts of a propane fire pit. Oxygen is essential for propane, thus the air mixer and vent(s).
Your last step in crafting the perfect propane fire pit is the smaller fittings and parts that bring everything together to create the roaring fire you crave.
Flex Lines
Whether you’re using built-in propane or an LPT, you’re going to need two flex lines to connect your fuel line to your ignition, and your ignition to your burner or fire ring. We recommend using Whistle Free Flex Lines if possible, as they are made of durable stainless steel and they prevent the common annoyance of--you guessed it--whistling.
Propane Air Mixers, Vents, & Fittings
You’ll also need to purchase a Propane Air Mixer, which connects just below your pan and brings oxygen into your system, allowing your propane to ignite. A vent--or a few--to bring oxygen into the base of your fire pit for your air mixer to use will also be essential. We offer some very stylish designs on our air vents--take a look. In addition, some other fittings may be required to complete your setup based on the ignition system you’ve selected.
Fire Pit Ledge
To make the installation of your pan easier, adding a few of these form fitting ledges into your fire pit’s interior walls will allow you to just drop the pan in, or remove it, without hassle.
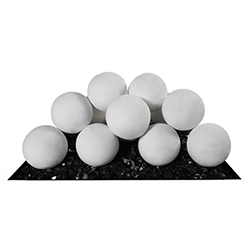
Fire Glass or Rocks
There are a lot of options when it comes to fire glass, and there’s even a variety of lava rock and fire stones to choose from. These are a great way of adding a finishing touch to your DIY fire pit, as they can be selected to match your existing décor. And wouldn’t you know it, we’ve got another article dedicated to expanding your knowledge of the types of fire glass.
Accessories
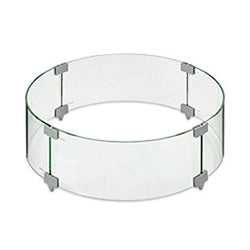
If you’re really looking to perfect your new fire pit, also consider some add-ons, such as a fabric cover to protect your pride-and-joy from the harsh weather, or a glass wind guard to ensure the flames stay contained within the walls of your fire pit.
We Can Help
 DIY fire pits are great because of their versatility. Perfectly design your fire feature to coexist with your outdoor decor.
All said and done, kudos to you for taking on the challenge of building your own propane fire pit. We can’t say it’s an easy task, but it’s certainly a worthwhile one. We hope these tips and tricks will support you in crafting the perfect fire feature for your outdoor space, and if you have any questions during this whole process, please feel free to reach out to us--we’re more than happy to help. We also encourage you to work with a local installer at any point if you’re in need of an assist.
For any additional questions on this article—or for expert help on any project—feel free to contact our friendly and knowledgeable staff by filling out this simple form.
Main Image: This propane fire pit showcases one of our decorative venting panels as well as some vibrant fire glass.