


Yes, it's soooo tempting to immediately start a cozy, roaring fire once those winter-season temps start dropping every year, which makes taking a little time for your fire pit or fireplace's winter maintenance prep even more important. It lets you enjoy a cleaner, safer, and worry-free fire. And that's what these simple checklists, pro tips, and easy steps are all about. Making it easier for your fireplace or fire pit to be winter-ready... without you needing to spend hours getting everything finished.
Here's a full guide to properly cleaning and maintaining your gas fireplace, but today we're sticking to just what's necessary as the winter season approaches.
But before we get started, just a quick reminder about safely managing fire features:
The Starfire Direct team has distilled their years of experience, so you can successfully and safely prepare your fireplace or fire pit for the cold months. But nothing replaces having a professional inspect or repair any fire features that aren't functioning properly.
Quick Fireplace & Fire Pit Winter Prep Checklist
Use this check-list to get your fire features ready for some safe, beautiful flames. But if you need more details for any step, just keep scrolling!
- Test your smoke and carbon monoxide alarms.
- Inspect the chimney, flue, firebox, and gas-fireplace glass for cracks, blockages, or damage.
- Remove all old ashes safely (more on that below).
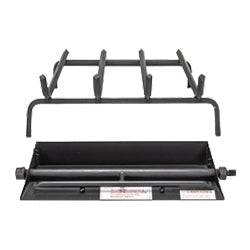
- Clean all burners and fire media; fully dry everything before reinstalling.
- Check for creosote buildup; schedule a professional sweep if 1/8" or more.
- Perform a gas-line bubble test for leaks, and call a pro if bubbles appear.
- Test the fireplace's damper and draft (newspaper smoke test); stop if smoke backflows.
- When not in use, put a high-quality cover on your fire pit and seal any cracks to prevent freeze-thaw damage.
- Store seasoned firewood off the ground and away from the house, and cover the top only.
- Schedule an annual inspection/cleaning with a CSIA- or NFI-certified technician.

Must-Ask Questions for Fire Feature Winter Maintenance
Okay, as often as not, asking the right questions can put you on the best path towards a safe, efficient fireplace or fire pit. So ask yourself these questions to help identify any potential problems you may need to fix (or get fixed professionally).
-
"Is my fireplace safe to light right now?"
The first safety checks for using fireplaces in winter are the simplest. Test your smoke and carbon monoxide alarms. Then, grab a strong flashlight and look up your chimney flue and inside your firebox (when there is no fire, obviously). If you see anything that looks like a blockage (a bird's nest, leaves) or obvious, scary-looking cracks, your answer is "no." -
"What’s the biggest risk I’m probably ignoring?"
That black gunk in your chimney isn't just "soot." It's a flammable byproduct called creosote. When you hear about chimney fires—and there are over 38,600 fire-related incidents linked to poor fireplace maintenance every year—this stuff is usually the culprit. -
"Do I really have to cover my outdoor fire pit?"
Yes. 100%. It’s not just about keeping leaves out; it’s about moisture. Water gets into tiny, invisible pores, then freezes, expands, and cracks your pit from the inside out. A good cover stops this "freeze-thaw cycle" dead. -
"What about my gas fireplace? It's 'maintenance-free,' right?"
Nope. Gas fireplaces are "low-maintenance," but not no-maintenance. Gas lines can have issues, the glass needs to be cleaned (for safety, not just looks), and the vents need to be clear. I'll go over a simple "bubble test" below that gives you total peace of mind.

Step 1: The Pre-Fire-Season Walk-Around
Before dialing up your local fire product professional, do the first thing they'd do... just look. This may just be the most important 10-minute walk-around you'll do all season. So put your own peepers to good use looking for any vulnerabilities that the mix of cold, ice, and extreme heat could turn into a disaster.
For Traditional Fireplaces: An Inside-the-Firebox Look
Grab a good flashlight and get your head in that fireplace. (Obviously this should be done only with a fireplace that hasn't seen a fire in well over a day.) What are you looking for? Well, you're going to inspect the firebox, which is the "cave" area where you build the fire. Look at the bricks and the mortar (that's the "grout") between them.

See any cracks? Is the mortar crumbling or looking sandy? If so, don't start any fires in there until you get it fixed properly... because this not just a cosmetic issue. I've seen it time and again: those little gaps, caused by the constant expansion and contraction from heat, can become a path for flames. Yep, that means fire can find a way through those cracks and start to burn the actual structural elements of your house. And this is far more common in older homes.
I remember a customer in a historic Philadelphia rowhome who tried to patch his firebox mortar himself. He was super proud of his DIY, but he didn't realize that using the wrong stuff can crack immediately. Becoming a massive fire hazard. Always ask professionals about the right solution: in this case refractory caulk. But really, this is a situation where you should always call a pro. This is one of those areas where local building codes are very specific, and a DIY repair that isn't up to standard could cause you major problems.

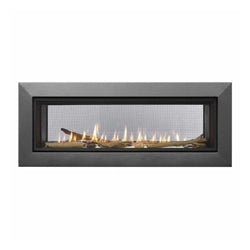
For Gas Fireplaces: A Glass Inspection
Gas fireplaces will need you to look over a few different areas. First, your main inspection point is the glass. You need to inspect the glass doors for any cracks, chips, or other damage. Damaged glass is a serious safety risk and should be replaced immediately.
And here’s a Starfire Direct pro-tip: Check the seal on the glass doors. Make sure they close properly and are perfectly sealed. It's so easy to think a gas fireplace just has a "drafty" door, but if the seal is shot then trace amounts of carbon monoxide (CO) can easily drift into your living space. Which is no bueno and definitely not safe. In fact, it can be a life-saving check.
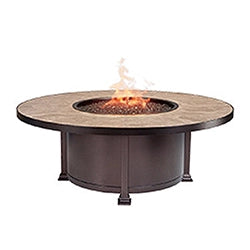
For Your Outdoor Fire Pit: How Does the Structure Look?
You can do this pre-fire visual inspection on just about any outdoor pit... whether it's a copper pit from Starfire Designs, a Prism Hardscapes concrete bowl, or an oldschool brick-and-mortar build. Before winter hits, give it a thorough look.
- Check for rust, loose hardware, or any structural cracks.
- For stone or brick pits, are any pieces loose or chipped?
- For concrete, do you see any spiderweb cracks?
- For any metal ones, is there any evidence of rusting?
This inspection is your first line of defense while winterizing your fire pit because the big enemy outside is the "freeze-thaw cycle." When it rains or snows, moisture can seep into those tiny cracks and pores. Then, when the temperature drops, that water freezes and expands with incredible force. This is how potholes are born and ruin roads. And it's how your beautiful fire pit can get destroyed from the inside out. Finding and sealing these cracks before winter is how you protect your investment (and your cozy outdoor enjoyment).

Step 2: Clean It Up Before You Fire It Up
A clean fire feature is a safe fire feature, but only if it's clean all the way through. So I'm not just talking about cleaning the parts you can see.
The "How Remove Ashes Safely" Chat (Because It’s Not Just Dirt)
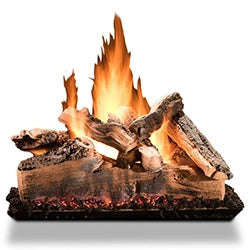
This one's for all of you hardcore, traditional, wood-burning fire pit or fireplace lovers. That old-fashioned fire experience requires some old-fashioned elbow grease... you must clean out old ashes before starting the new season. A thick bed of old ash actually holds moisture, which can rust out your grate and damage your firebox.
"How often should I clean ashes?" is one of the most often-asked wood-burning fire questions. During the season, you can leave a thin layer (about an inch) to help insulate the next fire. But for that first pre-season clean, you want to get it all out. And do it safely.
- Wait. Seriously. Wait at least 24 hours after your last fire. Hidden embers can and do hide for days.
- Use Metal. Never, ever, ever use a plastic shovel, a plastic bucket, or a paper bag. Hidden embers will melt or ignite them. Use a metal shovel and put the ashes in a metal bucket.
- Store It. I'll never forget a call from a Denver-area customer who dumped his “cool” ashes into a plastic trash bin in his garage. He said he waited 24 hours, but there must have been a live ember hiding in the ash. It melted the entire bin—he's so lucky he caught it before something on his house could catch fire. Always use a metal bucket, folks, and store it 10 feet from the house (especially if you're living with that dry 5280 air)!

Polishing Gas Burners & Fire Media
For your gas fire pit or fireplace, the pre-winter clean is all about taking care of those internal components.
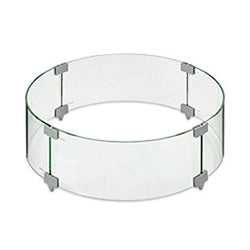
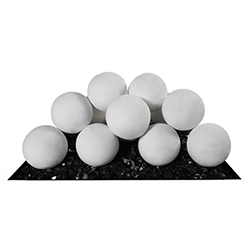
So start by removing and cleaning your fire media. If you have our Starfire Glass, you can actually use a shop-vac to suck it right up. Dump the glass gems into a bucket of soapy water, swirl them around, rinse, and then—and this part is the key—dry them off completely.
Next, take a can of compressed air and clean out the burner. You'll be amazed at how much gets in there. Tiny leaves, twigs, dust, hair, bits of debris... all kind of stuff. If you put your media back in while it's still damp, that water will freeze. And that freeze can cause serious future complications, which is professional-speak for "it can crack your burner or shatter your glass." Don't let a little impatience during a 10-minute cleaning job turn into a $500 repair.
Need an overview on fire pit media? Explore this Definitive Guide to Fire Pit Media.

Step 3: Take Care of That Chimney
This is, without a doubt, the most important part of your indoor fireplace prep. That's because it's not something we look at or deal with very often. "Out of sight, out of mind," you know what I mean? But when you burn wood, it releases a brownish-black, oily, highly flammable substance called creosote. This gunk sticks to the inside of your chimney flue. And just because you don't see it doesn't mean you won't have to deal with what this build-up does to your home.
Creosote builds up in three stages.
- Stage 1: Flaky and soot-like, and easily removed with a brush.
- Stage 2: It hardens into a shiny, black, glass-like deposit. Much tough to remove.
- Stage 3: Now it's really a problem. It's become a thick, sticky, tar-like substance that is basically concentrated fuel.
So, how do you check for creosote? Put on some safety glasses and a mask, and grab a strong flashlight. Open the damper, and use a fireplace poker to scrape the inside of the flue. If you have a buildup that's 1/8-inch thick or more, or if it looks shiny and tar-like, you have a fire hazard.
Here's something people get wrong all the time. They buy a "Creosote Sweeping Log," burn it, and think they're good for the year. But here's the thing: those logs are not a substitute for an actual cleaning... much less a professional cleaning. What those logs do is release a chemical that can help turn some of the Stage 2 or 3 creosote into a more brittle form, making it easier for a chimney sweep to remove. They're a chimney cleaning supplement, not a full solution. Burning one can give you a false sense of security, which is dangerous.

The Professional's Touch: Why We Trust a CSIA-Certified Pro
The National Fire Protection Association and the Chimney Safety Institute of America (CSIA) both recommend a professional inspection and cleaning at least once a year. We've seen that about 72.4% of homeowners clean their fireplace annually, which is great.
When you hire a pro, they're not just running a brush up there. They're performing what's called a Level One inspection:
- Checking the exterior of the chimney for cracks or leaning.
- Inspecting the attic (if it passes through) for proper clearance from insulation.
- Checking the chimney cap (that little "hat" on top) to make sure it's secure and keeping animals and rain out.
- Inspecting the flashing (the metal seal where your chimney meets the roof).
That last one is huge. Bad flashing can cause water leaks that lead to thousands in damage, like wet ceilings and mushy drywall. Plus, 65% of users report improved heating efficiency after a professional cleaning. Now, that's a win for safety and your heating bill.

Step 4: Check Your Alarms, Gas Lines, and Airflow
Now, this winter maintenance prep step is fast, easy, and absolutely non-negotiable. An important part of maintaining your fireplace is maintaining your alarms. Fully functioning smoke detectors AND carbon monoxide detectors are must-haves.
CO is often called the "invisible killer" because you can't see it, smell it, or taste it. A blocked chimney or a bad gas fireplace seal can fill your home with it. Test them monthly (just press the button), replace the batteries annually (even if they're not chirping), and replace the entire device every 10 years.
Just as important is checking your fuel source. This is my favorite trick for empowering homeowners. It's the "bubble test" I've mentioned before, and it's an easy way to check for gas leaks.
- Mix a little dish soap and water in a bowl.
- Turn on the gas supply to your fireplace or fire pit.
- Using a brush or a cotton ball, dab the soapy solution onto the gas connections and valves.
- Look closely. Do you see bubbles forming?
If you see bubbles, that means you have a tiny gas leak. If you do, don't panic. Turn off the gas supply immediately, ventilate the area, and call a qualified technician. Do not try to tighten the fitting yourself unless you are certified. From my perspective, this is not a DIY-and-see-what-happens job. Gas work is serious, and improper repairs are not only dangerous, but are often a direct violation of local ordinances. So the bubble test = peace of mind, every time.

And lastly, let's talk about airflow... that smoke is going somewhere. And if the smoke can't vent properly, it pushes that smoke right back into your house. First, make sure your damper (the metal flap) opens, closes, and seals properly. They can get warped or stuck. So before you light your first big fire, you need to test your fireplace ventilation, or "draft." You can do a DIY version. Roll up a piece of newspaper, light the tip, and then blow it out so it’s just smoking. Hold it up inside the firebox near the flue. The smoke should get pulled straight up the chimney.
A new homeowner in Seattle called, so frustrated that his house filled with smoke every time he tried the fireplace. He was worried about a major repair, but it turned out a family of birds had built a massive nest in his chimney during the (rare) sunny stretch. So if smoke backflows, STOP—it almost always means a blockage or pressure issue, and you need a pro. And, of course, once you have a fire going, always use a spark screen to prevent embers from escaping. Simple, but safe.

Step 5: Protect Your Fire Pit With a Well-Made Cover
Do you really need a fire pit cover? You already know my answer to this. Yes. You should. Nothing will ruin your fire pit faster than snow and ice. Moisture ruins how your fire pit performs as well as how it looks. But finding the right fire pit cover prevents rust and corrosion on metal parts, keeps pests from nesting in the burner, and stops debris from clogging your system.
But like I mentioned earlier, your fire pit's real winter enemy is the freeze-thaw cycle. A well-fitting cover literally stands in the way of your pit being brutalized by this cycle. It'll keep your fire pit looking great and keep winter of water from seeping into all those pores and cracks, freezing, and expanding. Plus, it helps your pit in a few other important ways:
- Prevents rust and corrosion: Protects metal components from moisture.
- Keeps out pests: Deters animals from nesting in the burner.
- Stops debris: Prevents leaves and other debris from clogging the system.
- Protects against freeze-thaw cycle: Prevents water from seeping into cracks, freezing, and causing damage.
- Extends lifespan: Helps maintain the aesthetic and structural integrity of your fire pit.
And please don't think this just happens to people living in snowy places. We had a SoCal customer try to save some cash on a cheap vinyl cover for his Starfire Designs pit. He didn't have to deal with snow, but you know what they did have? Relentless sun. And the fire pit was showing cracks in one season. But one of EcoSmart's Fire Nova 600 covers was more than up to the task, handling both UV rays and the damp "June Gloom" without failing. That polyester material is the pro choice because it's UV-resistant, waterproof, and stays flexible in the cold so it won't crack.
A cover is your best defense, but if you have a concrete, stone, or brick fire pit, applying a weatherproof coating or sealant can give it an extra layer of protection. Just be sure you get one that's specifically rated for high-heat applications, as well as waterproof. That'll make water bead up and roll right off, instead of soaking in.

Your Winter Prep Warm-Up
So, that's it. Our 5 winter maintenance steps to prep your fireplace or fire pit for a cozy, safe season of fire. And it's way more than just a list of chores. This is a list of ways to protect your home, your family, and all the great memories you'll get to make during the cold months.
Whether you're a beginner or just needing a refresh, we've covered how to inspect, how to clean, what tools to use, what safety checks to run, and how to protect your gear from the weather.
So, what's the Starfire Direct team's final piece of advice? Schedule Professional Maintenance.
DIY tips are fantastic, but nothing replaces the peace of mind you'll get from an annual inspection by a CSIA-certified technician. They'll have the tools, the training, and the cameras to see inside your chimney... spotting issues you and I just can't see.
If you've still got questions or concerns, we'd love to chat. Just reach out to the Starfire Direct team; we're here to help you get this right. Get your prep done, get that pro inspection on the calendar, and then go enjoy that fire.
You’ve earned it. Stay warm, everyone.