


Here’s the deal. My first attempt at fixing up our backyard? Pretty rough. I tried throwing together a fire pit using some old bricks from a landscaping job and this YouTube video that made it look way easier than it really was. The result? Picture a squirrel riot in the middle of a construction zone. Not exactly cozy.
But I’m not the type to quit once I get an idea in my head. So I kept at it. Made a lot of mistakes. Eventually landed on a handful of projects that made our yard a space we actually like being in. Nothing over-the-top. Just stuff that fits our style and, somehow, actually worked.
Thinking about making some upgrades yourself? Trying to keep your budget (and your sanity) in check? Here's what I tried. Some of it worked right out the gate. Some of it... not so much.
Let’s get into it.

Image provided by mrichlak on Reddit.
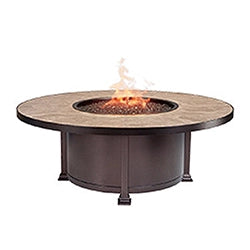
1. DIY Fire Pit Tables
I used to think fire pit tables were kind of unnecessary. I figured a regular pit was good enough. But once I tried both, I totally got it. Fire pit tables make it way easier to snack, hang out, and just chill. People naturally gravitate toward them.
The first version I had was a cheap metal bowl from Lowe’s sitting on stacked cinder blocks. Looked like something a trash panda might use to toast marshmallows. It worked, sort of, but I never felt super safe with kids around.
Eventually, I built a better one. Used 7.75 by 5.25 inch Belgard pavers for the base. Found a beat-up steel coffee table on Craigslist and added a cedar top from boards I already had in the garage. Cut a 20-inch square out of the center and dropped in a Warming Trends Crossfire burner (CFB120 model). It set me back around $385, which made my wallet wince a little, but it’s held up great. No flame issues, no clogs, just solid heat.
Quick lesson from my first build: make sure your propane tank is easy to access. I didn’t. So I ended up tipping the whole thing over like a clumsy circus act just to change the tank. Now I’ve got an access door. Problem solved.
A guy at the local outdoor store (let’s call him Steve) told me Firegear tanks handle weird weather swings better than others. I’m not a tank expert, but mine’s stayed steady through chilly spring mornings and toasty afternoons, so maybe he’s right.
Here’s how I built mine:
Step 1: Choose your burner pan from Starfire Designs. Round, square, linear They’ve got it all, made from durable 304 stainless steel with weep holes for drainage. Chic and practical? Yes, please.
Step 2: Measure and cut a hole in the center of your table to fit your burner pan.
Step 3: Drop in your burner and hook up the components. Want that clean, custom look? Use a Drop-In propane kit to neatly tuck your propane tank underneath like the VIP it is.
🔥 Important Disclaimer: When dealing with gas, don’t DIY the dangerous stuff. Starfire Direct recommends hiring a certified pro to ensure everything is safe, legal, and ready to ignite.
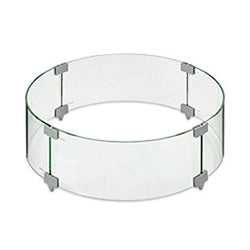
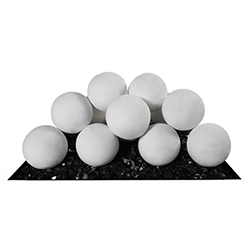
Step 4: Add your fire media: think shimmering fire glass, dramatic lava rocks, or modern ceramic fire balls. Light it up, sip your spritz, and soak up the compliments.
Boom. You just went from “meh” to meh-pic... get it?
Want to keep your family and pets safe around your fire pit table? Read this guide for essential safety tips and smart ways to prevent mishaps.
2. Upcycled Furniture
I thought I was being clever once by dragging an old recliner out to the patio. It looked awesome for about ten minutes... Then it rained and turned into this bloated, funky-smelling disaster that I had to drag to the curb.
Lesson learned. Now I look for solid stuff (oak, metal, anything that won’t dissolve in humidity). I picked up a cast iron bench frame at a flea market for $30 and sanded off the rust, sprayed it with Rust-Oleum (the oil-rubbed bronze one), and added slats from leftover cedar fencing. Held up great, even after the ridiculous windstorm we had last December that took out half my neighbor’s shed.
I also turned an old dresser into a potting bench. I took out the drawers, reinforced the shelves with scrap wood, and sealed it with three coats of spare urethane. A word of caution if you’re adding cushions: skip the cheap stuff. I’ve tried the bargain ones, and they faded to a weird orangey-pink color after just a month in the sun. Sunbrella costs more, but it does hold up way better.
But I would avoid particleboard: even the "weather-treated" kind swells up like a soggy sponge and starts peeling in layers. Not worth the headache.
Here’s how to breathe new life into old favorites:
- Pick the Right Candidates - Solid wood or metal pieces work best. Think sturdy, not spongy. If it’s falling apart, it’s firewood, not furniture.
- Prep Like a Boss - Sand off flaking paint, fix loose joints, and clean it thoroughly. Your piece deserves a fresh start.
- Seal the Deal - Use outdoor-rated paint, stain, or sealant to weatherproof your project. Mother Nature can be moody, your furniture shouldn’t be.
- Style It Up - That old dresser? Now it’s a garden tool station or cocktail bar. Coffee table? Try it as a succulent altar. Just add new hardware or wheels for a fresh, functional twist.
One person’s junk, is your patio’s new centerpiece.

Image provided by Lights2u
3. DIY Lantern Chandelier
This project was so simple it almost felt like cheating. Just a handful of old lanterns, some rope, and a beam to hang them from. I originally used real candles. Looked amazing. Until a gust of wind nearly set my hair on fire. Switched to battery-powered flicker lights the next day.
Most of the lanterns came from yard sales, maybe five bucks each. I tied them with jute rope to a scrap piece of driftwood and suspended it under our pergola. Inside each one, I popped in a Lumabase LED. The 37401s are the ones that didn’t have that weird bluish tint.
If you mix up the hanging heights, it feels more like art than just lights. And if you want to get extra with it, you can weave in a strand of fairy lights. We did that for a party, and people kept asking if we hired someone to decorate. I just laughed because, honestly, I got the idea from an old Fixer Upper episode and ran with it.
Here’s how to make it light up your life:
Step 1: Snag 3–5 decorative outdoor lanterns with LED candles (battery-powered = low maintenance and super safe).
Step 2: Use chain or thick rope to hang them at staggered heights from a pergola beam, sturdy tree branch, or patio overhang.
Step 3: Wrap string lights around the ropes and overhead beam to add a soft, ambient sparkle.
The result? A glowy, romantic light fixture that whispers classy, cozy, and fire-code friendly.

4. Garden Pathway: Step into Style
I didn’t think a path mattered. But after slipping in the mud one too many times while carrying groceries, I realized I needed one.
Ours runs just under 27 feet. I started by laying out a garden hose to figure out the shape. Then I dug a shallow trench, lined it with the thicker landscape fabric from Vigoro (not the cheap roll that tears if you sneeze on it), and used 16-inch slate stones I found at a local yard that sells by the pound. I think the whole thing cost me around $78.
Filled the spaces with decomposed granite. Good drainage, no puddles. If you want to avoid weeds, toss in some polymeric sand between the gaps.
My kids painted a few of the stepping stones. Little animals, some squiggly lines, stuff like that. Now they call it the "secret trail." It's kind of adorable, actually.
Here’s how to step it up:
- Lay It Out: Use flat stones, wood planks, or bricks in a winding or S-shaped pattern.
- Add Texture: Fill gaps with gravel or river rock for that spa-retreat vibe.
- Elevate the Experience: Border the path with solar lights or low plants like lavender or thyme for a sensory bonus.
Suddenly, walking to the shed feels like a stroll through a secret garden.

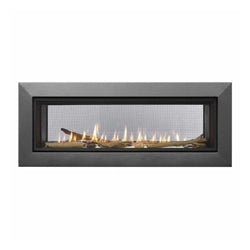
5. DIY Fire Pit: The Ultimate Backyard Centerpiece
I’ve built three different fire pits. The first one was too close to the fence and made the whole yard smell like burnt cedar. The second was too shallow and kept going out when the wind picked up. The third one finally worked the way I imagined.
I dug a circle about 44" wide and 20" deep, dropped in a few inches of gravel for drainage, then lined it with fire bricks. I used a 36-inch Starfire Designs steel fire pit ring that I got on sale for around $90. That thing’s been through rain, snow, and more than a few rowdy s’mores nights and it's still holding strong.
Place it at least 10' from anything that can burn. I think I gave it 14' just to be safe. Also, double-check your city’s regulations. I didn’t, and ended up getting a surprise visit from the fire department. They were nice about it, but still wasn't how I wanted to spend a Saturday evening.
We keep a hose and a bucket of sand nearby just in case. So far, haven’t needed either but it’s a good peace-of-mind thing to have.
🔥 Safety First: Any gas installation should always be handled by a certified professional. Starfire Direct strongly recommends this to ensure everything is up to code, safe, and ready for cozy nights ahead.
Here is a helpful video to showcase what parts go where in a propane DIY fire pit setup.
Looking for the ultimate guide to outdoor fire pit media? Discover how to enhance your backyard experience - read our comprehensive blog post.
Video provided by Starfire Direct via their YouTube channel.
Here’s a breakdown of how to bring the heat:
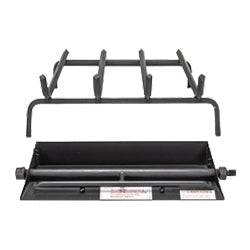
Step 1: Pick your burner pan (round, square, or linear). Each is crafted from 18-gauge 304 stainless steel because quality matters.
Step 2: Build your base using fire-safe materials like concrete blocks, stone, or a steel fire pit frame kit.
Step 3: Drop in your burner and connect it safely (with the help of a professional, of course: see below).
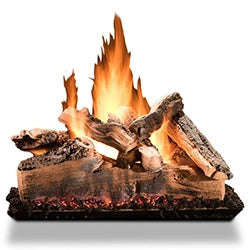
Step 4: Top it off with your favorite fire media. Think bold black lava rock or shimmering blue fire glass. Then just light it up and let the vibes flow.
Ready to Transform Your Backyard?
Honestly, this whole backyard thing has been way more rewarding than I expected. It’s been years of weekend projects, a few total fails, and a whole lot of learning.
Whether you're creating that centerpiece fire pit, flipping old furniture into outdoor glam, or crafting an elegant lantern chandelier, each project adds style, function, and a whole lot of personality.
My advice? Don’t wait for perfect, just start with what you’ve got. That rusted chair at a garage sale? Could turn into something cool. That weird corner of your yard no one uses? Maybe it's time it got a path or a bench. And hey, if it doesn’t work out, no big deal. I’ve learned just as much from the mistakes as I have from the wins. Probably more, honestly.
So grab your tools, cue the playlist, and let your backyard glow-up begin.